Outlining
Before you begin writing your essay, you need to create an outline.
Why? Because an academic essay must have a carefully designed structure. The controlling ideas must be balanced; the support must be appropriate; and the parts of the essay should be in a reasonable order, which flows smoothly from beginning to end.
It is extremely difficult to do this well if you do not create an outline for this purpose.
Start with Your Main Ideas
After your brainstorming exercises, you should have a thesis statement and three topic sentence ideas. In the previous chapter, you should have tested your controlling ideas to make sure that they work well together.
Now, you should consider what order to put your topic sentences in. Many students simply use the order in which they created the ideas. This will not work well, because you have no clear idea why they are in that order.
When you write your essay, you will connect your ideas using specific language, connections between stories, and an overal sense of narrative storytelling and message-writing which is unique for your overall idea. This works best if you arrange the ideas in an order that makes sense to you. You could use many different arrangements, but the most important point is that the arrangement makes sense to you!
I will start with the basic outline I finished in the previous brainstorming exercise:
- Thesis Statement: My boss was shamefully unprofessional
- He lied to and cheated business associates
- He broke many laws
- He treated workers poorly
Now I must consider: what order of topic sentence ideas makes the most sense to me? Looking at the list, I decide to change it to this order:
- Thesis Statement: My boss was shamefully unprofessional
- He treated workers poorly
- He lied to and cheated business associates
- He broke many laws
I might change that order later if I find a reason to, but for now, I like it. I want to begin with something that is interesting: treating the workers poorly—abusing workers will make the reader share my disgust with him, and many people have similar stories. It is also the weakest idea, which will allow me to get stronger later. Then I will add the idea that he mistreated people he did business with—he cheated them, in fact! And then, I can move on to the strongest point: he broke the law!
This order sounds good, as I can start at a place where the reader will sympathize with, and then get stronger and stronger until the reader agrees—he should have gone to jail!
(Aren't you kind of interested now?)
Create an Outline Format
This is a bit difficult for some people, because the outline requires complex indents. An indent is when you move text to the right by 0.5 inches. In addition, lines after the first line must indent another half inch.
Here are the basic rules (see your MLA manual pp. 41-46):
- General points are indented least; specific points are indented more
- The order of numbering is I, A, 1, a
- Points of equal importance are equally indented
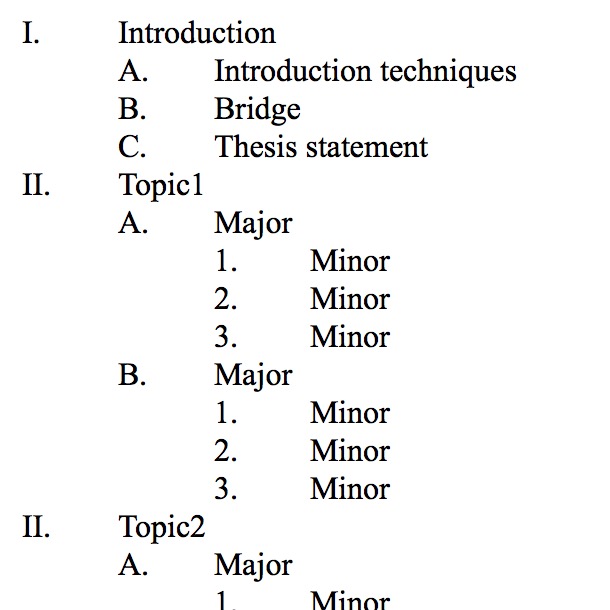
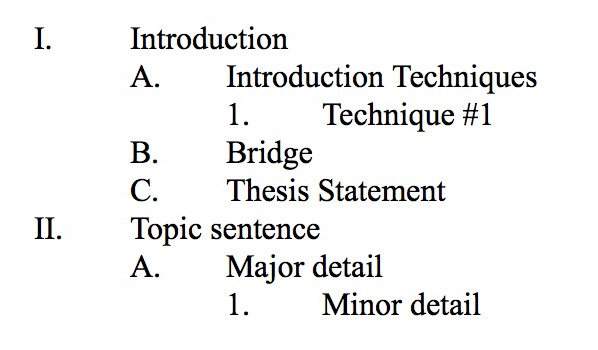
The introduction begins with I, II, III, etc., as do all topic sentences, and the conclusion.
The thesis statement and major supporting details begin with A, B, etc.
The minor supporting details begin with 1, 2, 3, etc.
See the image at right for an example.
Hanging Indents
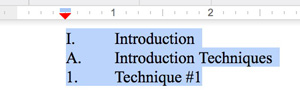
One point many people have difficulty with is the hanging indent. In an outline, any point begins with the first line indented by a certain amount. However, the second line naturally wraps back to the beginning of the next line. Notice, in this image, the last line, for the point "1":

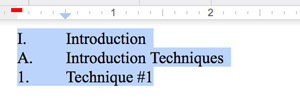
Notice how the last line wraps around too much? That's not good. Instead, this is what it should look like:

You can do this with paragraph indents. I will show you how.
Create Your Document
Follow these steps:
- Create a new Google Doc by clicking on the "New" button in Google Drive
- Add a header as we learned previously: your family name, followed by the page number.
- Add the top-left information including your name, the class, the assignment title ("Essay #1 Full Outline"), and the date
- Add the title for your essay
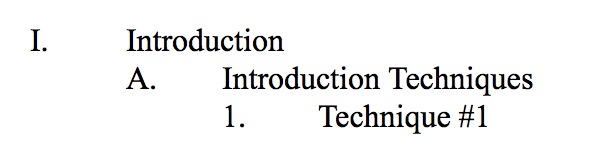
That's the basic format. Now, using single-space, type the following without any indent:
I. Introduction
A. Introduction Techniques
1. Technique #1
Make each line by typing the number (I, A, 1), then a period, then a tab, and then the words.
Next, make a hanging indent. First, select all three lines you just made. Then, in the ruler (View menu > Show Ruler if you don't see it), click on the triangle button and move everything to the right by 0.5 inches.
Then click on the rectangle button just abover the triangle, and move it back to the original spot:
Next, select only the last two lines (A. and 1.), and then click on the increase indent button in the toolbar, just once.

Then select only the last line (1.) and click on the increase indent button again. Your text should look like this:
That's all the indenting you need to do. Now, you can just copy and paste lines until you have this:
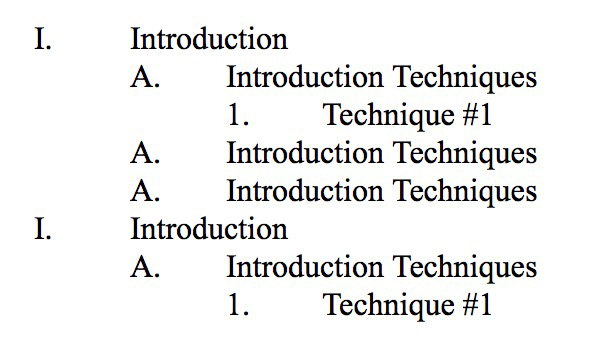
Then just replace some text:
Next, copy and paste the "II" paragraph and change the numbering so it looks like this:
You should get the idea. Watch the video below, and I will show you these steps in real time. This creates the format for the outline.
Fill In Your Essay Details
Now that you have an outline, the next step is to change the text you made, and fill in your information instead. You don't know the introduction techniques or the bridge you will use, so leave them like they are.
Instead, fill in the thesis statement and topic sentences. I made them red so you could see them; do not use red text in your outline!
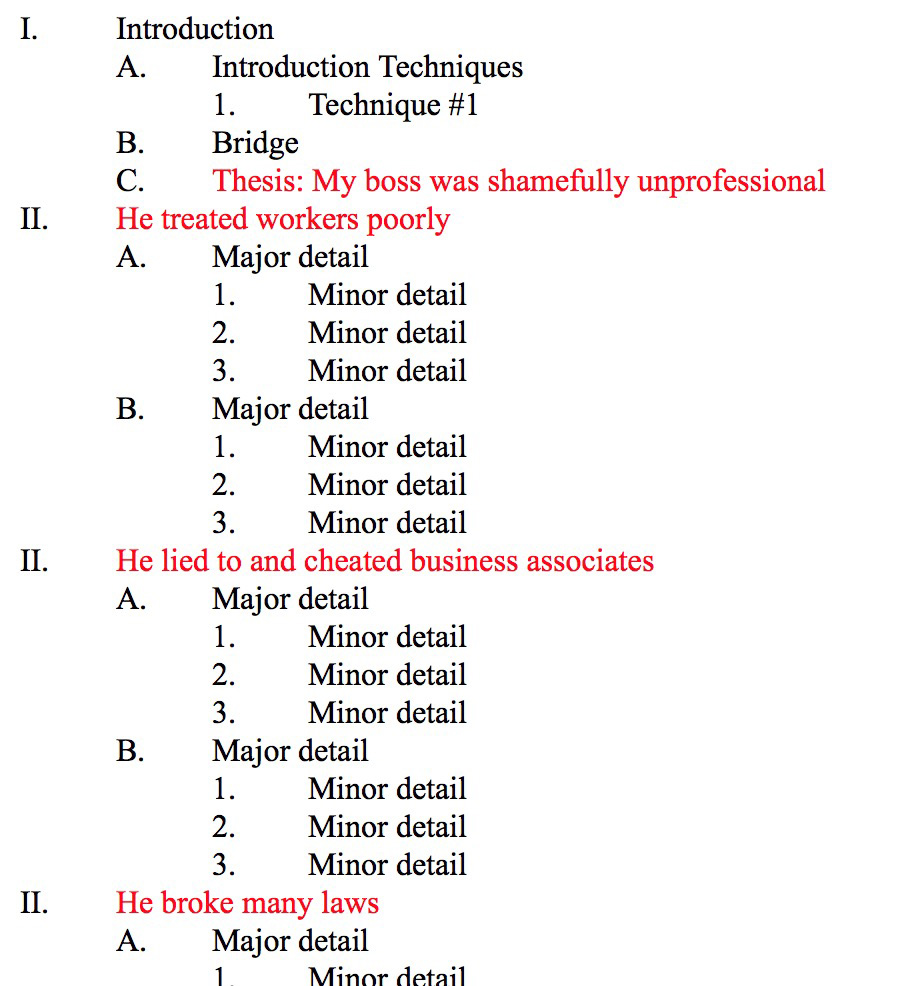
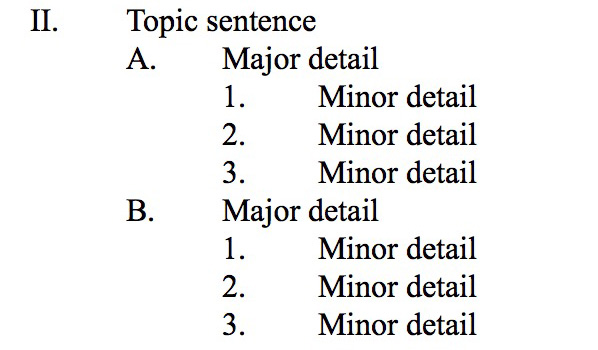
Next, Decide which examples you will use for each paragraph. Go back to your brainstorming list and find the best examples that belong to each group. Then place them in the Major Detail spots:
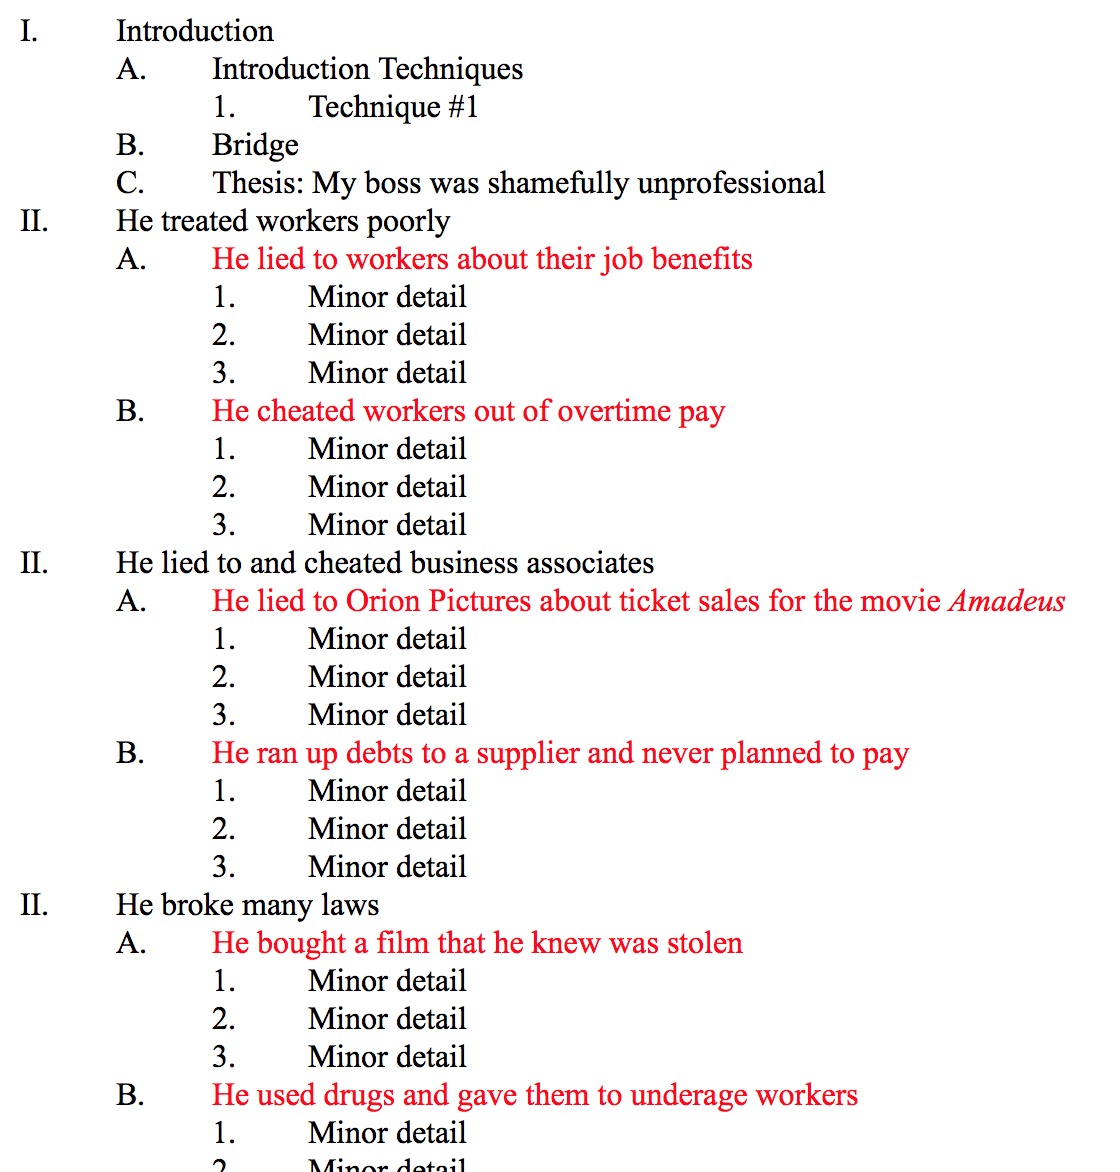
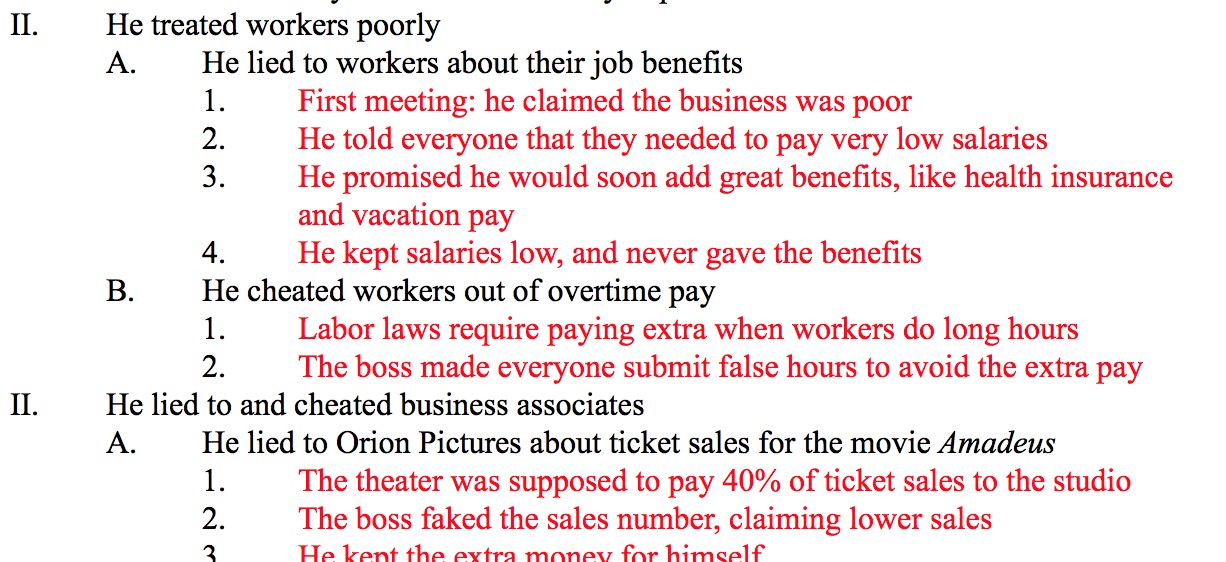
Finally, fill in the "Minor Detail" lines with basic points that you think you will write about in each example.
You don't need exactly three lines in each. Some may need two, some may need four. You do not have to add every detail you will use; instead, just write down the bigger points of each story. You will add many more details when you write the draft.
Keep going until you reach the end; then you should be finished!
You will fill in the introduction and conclusion details later; for now, just consider the thesis statement only for those paragraphs.
If you follow these instructions, then you should be able to create a very detailed outline! This is what is due on January 20th.